Monday, December 15, 2014

Elle Girl No.86 Swatch

Hello everyone!

Here's a swatch of Elle Girl No. 86 polish. It is a Korean brand polish my friend got me as a souvenir. 

86 is a sheer creme white polish with glitter chunks is them! Including snowflakes and stars, there are also multi coloured hexagonal and round glitters. I suggest painting a layer of white polish before applying for a more opaque look. The photos show 3 layers of the polish. 

*Photos are at the bottom of the post because I'm using the Blogger app. 

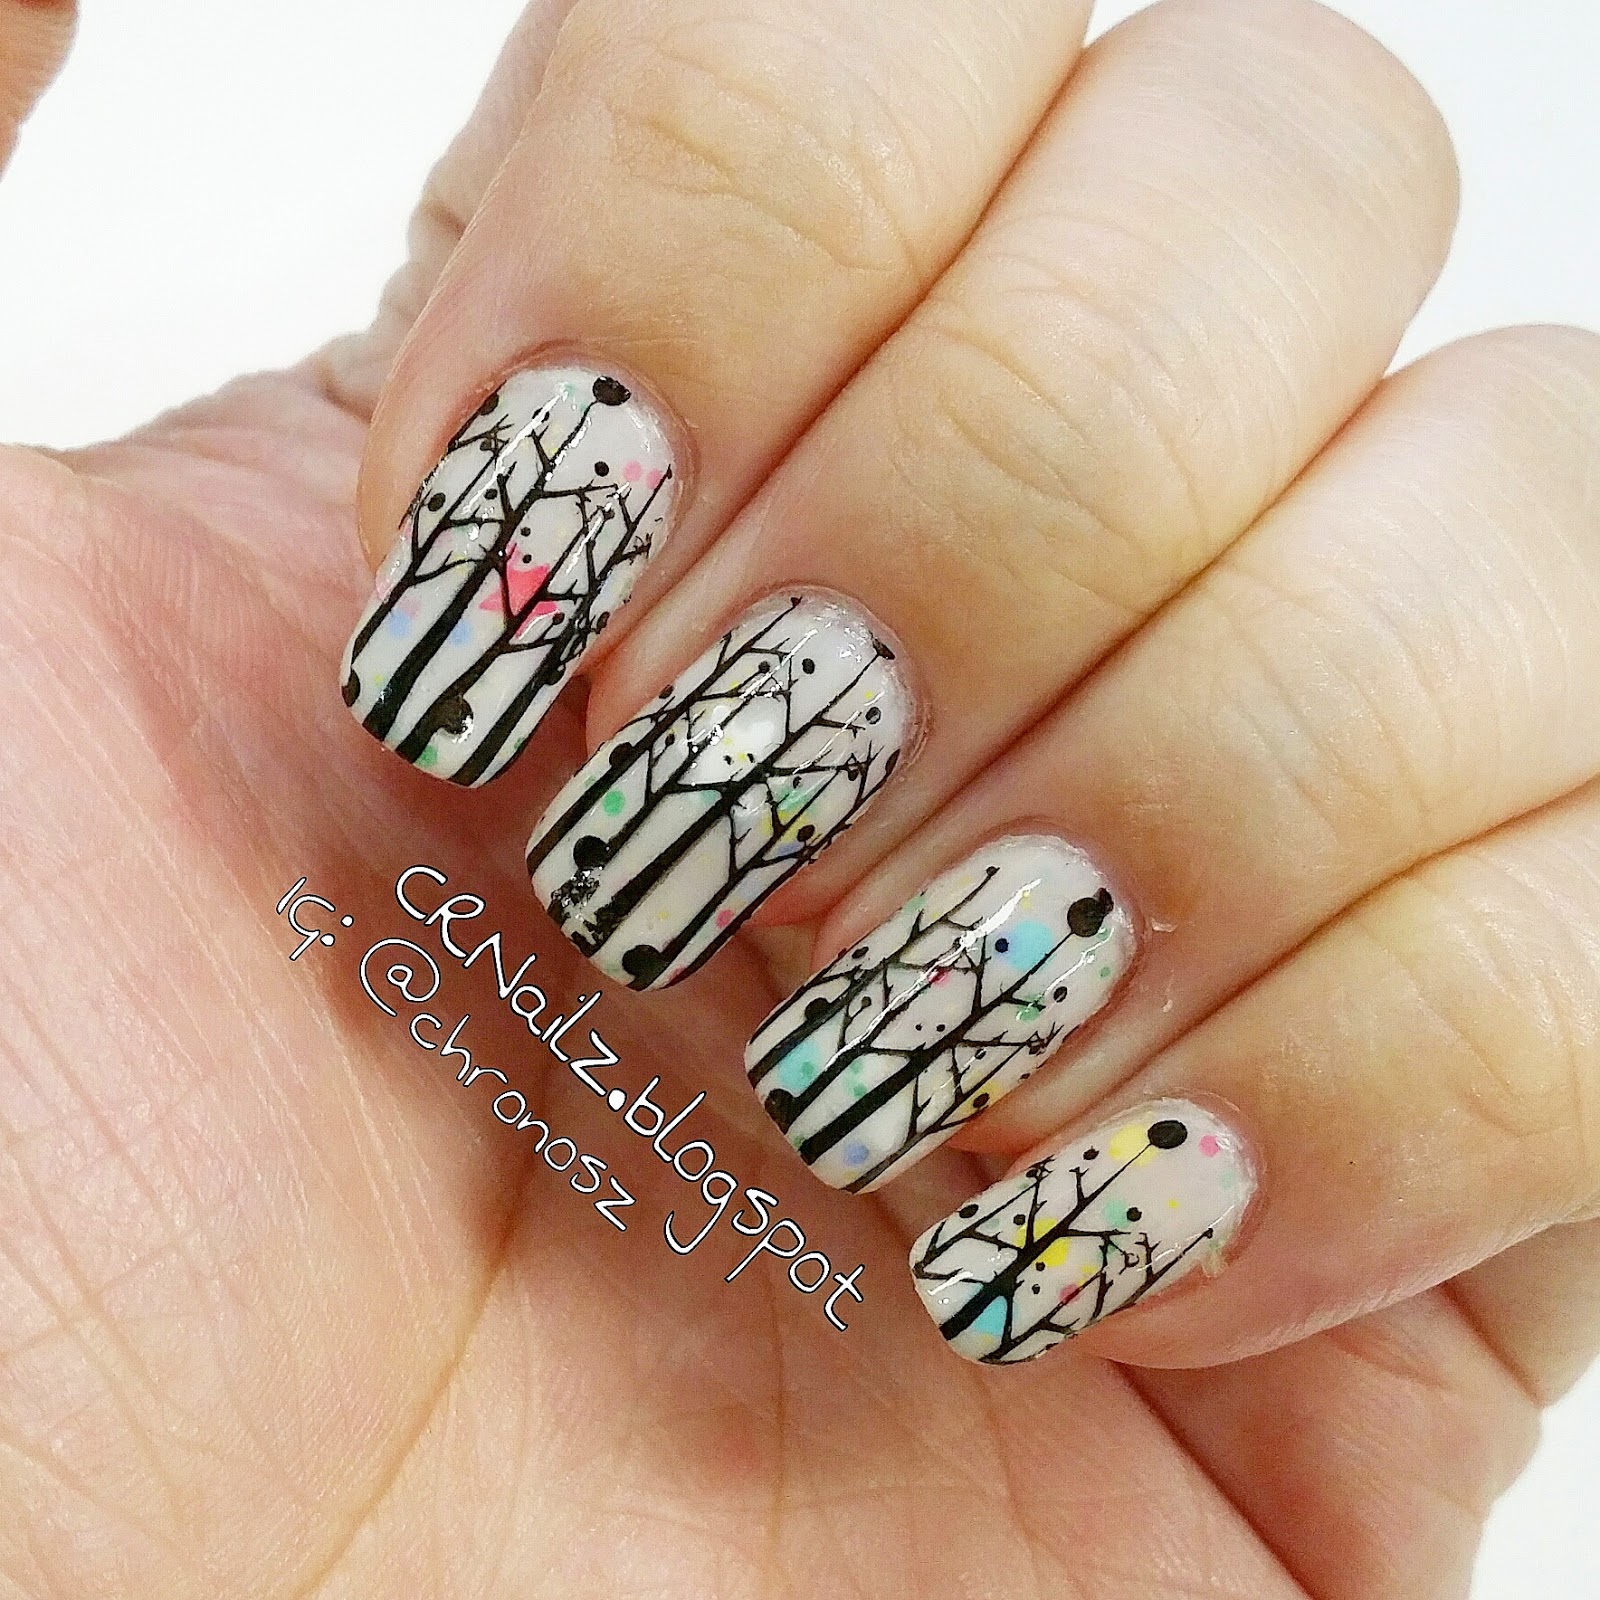
I didn't want to just remove the polish so I did a bit of reverse stamping. :) 

Using Bundle Monster plate BM-407 I stamped some trees using Laval black and topped with Glisten & Glows HK Girl Top Coat. 

The next day I matted the mani with Miss Ashleighs Matte Hatter and I must say that the matte version is so much prettier! 

That's it for this post.
Cheers.


Wednesday, December 10, 2014

Normal Stamping Vs Reverse Stamping

Hey guys! 

I posted this mani on instagram (@chronosz) last night and wanted to discuss the pros and cons of 'Normal stamping Vs Reverse Stamping'.


The photos are not very clear but hopefully it will suffice for this brief explanation. 

I used reverse stamping on the pointer finger whereas the others were done using the normal stamping method. From my observation, the design is clearer and neater using the reverse stamping method. On the other hand, the normal stamping allows for missing pieces of the pattern and the design can sometimes come out crooked. 

This can be explain by the following:

  1. You did not stamp the design properly
  2. Part of the polish dried 
  3. The polish you are using is not suitable
For me, I am still looking for a good stamping polish. my favourite black polish from The Faceshop is too sheer for stamping. So far, I have purchased black polishes from Laval and Rica. Truth be told, I was incredibly excited when I got my Rica polishes. I had seen so many beautiful manis using her polish but to my dismay it was not meant to be. The Rica polish was impossible to stamp with, even with the reverse stamping method. I'm not saying that it's not good but there were other factors preventing me from using it properly. I'll comment more on this in a different post. 

Getting back to the topic at hand, reverse stamping is done by top coating the design when it is on the stamper, wait for it to dry, peel it off, top coat your nail and paste it on like a nail wrap. Basically, it's a DIY nail wrap. The reason why the design comes out neater is because reasons 1 & 2 do not apply here. The downside is that it could come out uneven when you're putting it on your nail. I still have difficulties with it and most of the time, the side of the 'nail wrap' doesn't stick on the nail and it leaves air pockets. 

It is best to press it down onto your nail and make sure it's stuck on hard first before cutting off the excess and applying another layer of top coat. Here's a video tutorial from the amazing Sveta Sanders. Check here instagram out for more amazing manis!!


In my opinion, normal stamping is all good if you've got a good polish while reverse stamping is good when you have some of the problems above like I do or if you want to add a little colour to the design. 

That's all for this post! 
Cheers!

Wednesday, December 3, 2014

Tribal Winter

Hey peeps!

I totally did not notice that this post didn't go up! So here it is!

In the meantime, here's another mani using one of Miss Ashleighs polishes!


I used 'And it was all yellow' from her neon collection for the base, black polish from The Faceshop and the design using acrylic paint.

Chrismas manis are popping up on instagram and I'm no stranger! The green and red was a MUST! :)

That's it for this post! See you all really soon!

Cheers!

Bubble Trees

Hey all! 

Here's the continuation of yesterday's mani! 


I call them bubble trees!! The best part is that I have a picture tutorial for you guys so you can paint them yourself! This is probably my first time making a tutorial so bear with the bad photos and instructions! Here we go! 


  1. Use Christmas colours (or any colour you like) using the Nimbus Bubbles technique (tutorial on The Nailasauraus)
  2. Overlap lightning nail vinyls (i'm using ones from Teismom) with the lightning facing out until it forms a tree shape
  3. Cut off the excess at the top until it is pointed
  4. Paint over the sides of the vinyls, making sure that you do not get any polish on the middle and the bottom of the nail as there will be exposed areas
  5. Remove the vinyls and apply your favourite top coat (I'm using Glisten & Glow HK Girl)
That's it! I hope you enjoyed the tutorial and I will see you soon! 

P/S: Don't forget to tag me @chronosz on instagram if you used the tutorial! 

Cheers! 


Tuesday, December 2, 2014

May You Have A Bubble Christmas!

Hey guys!

So I just finished Day 2 of Blogilates #Decemburn Calender! I have a love hate relationship with cardio...

Anyway! I decided to do something with my current mani but I shall leave it till tomorrow to show you guys that mani!

First, let me share my current mani. I tried out Nailasaurus's youtube tutorial on the nimbus bubbles technique. I definitely need more practice but practice makes perfect as they say.


Colours used:

White - OPI Alpine Snow
Red - OPI Big Apple Red
Green - Sally Hansen Emerald City

Look forward to the surprise tomorrow! 
Cheers!

Friday, November 21, 2014

Snow in Santorini

Hey all!

I've got a lot of swatches for you and I can't wait to share them! I'm still editing the photos so please be a little more patient k! :)

For now how about my NOTD featuring Miss Ashleighs new texture polish See You In Santorini! 


Some negative space and snow sounded really good so I painted it! I painted the snowflakes with white acrylic paint using a detailing brush from Faburnails and the negative space using nail vinyls from teismom! Do check them out! 

When I did the swatch for See You In Santorini, I liked it a lot better matted. In this mani, I matted the pointer finger.

What do you guys think? Matte or gloss?

That's it for this post! Stay tuned for the swatches!
Cheers!

Wednesday, October 29, 2014

RWBY

Hello all!

I'm not really feeling the other Halloween manis so here's another anime inspired mani instead!
I've been meaning to watch this anime for some time now since my bf was talking about it. It's an English animation with awesome battle scenes and although each episode is only 15 minutes long, it's freaking awesome!

So, this design was inspired by the monsters in the anime called grimm. I couldn't really get a clear image of them from the anime so i asked mr. Google. 

I found illustrations of the grimm on deviant art. 


I think this is quite good work considering I'm still a noob at acrylic paint. Check it out!


See you guys next time!
Cheers!

Sunday, October 19, 2014

Casper The Friendly Ghost

Hey guys!

I finally painted the right theme for the right day! Today's theme is ghost and guess who I picked as my muse!

Casper the friendly ghost...(did you just sing that sentence?)

I got the proportions wrong again but I think this is my best work using acrylic paint thus far! 

Enjoy! Cheers!

Saturday, October 18, 2014

Monsters, Bats & Anime

Hello all!

Halloween is drawing near and here I am behind on my nail art challenge...and also working overtime but enough about that!

So I have  recently completed watching seasons 1 and 2 of the anime, Rosario Vampire. There is still cute and funny bat that narrates the first season and I just thought that I had to paint it and as luck may have it that the challenge needed a monster XD

So here's Kou-chan the bat! 

The base is Australis Peek-a-boo which is a nice creme violet. The design was painted on with acrylic paint.

That's it for this week! Stay tuned for more!
Cheers!

Wednesday, October 8, 2014

Halloween Challenge

Elo all!

So this year I have decided to yet again join another Halloween Challenge! Although...I am a couple of posts late =S

Here are the manis for the first 2 days!

Day 1 - Pumpkins
Day 3 - Skulls & Bones
(Photos at the bottom of the post)

The pumpkin nail art is inspired by Eva @coewless (instagram) from Coewless Nail Polish Blog She does really mind blowing nail arts! Love her!

The skulls and bones design was something I've been waiting to try for a while now. The base is my favourite black polish from the Faceshop and the design is drawn with acrylic paint.

My HK Girl Top Coat became gooey so I used my Seche Vite Fast Drying Top Coat instead. There was some serious shrinkage going on but I'll leave that for another post.

That's it for this post!
Cheers!

Sunday, October 5, 2014

Wedding Dinner Nails

Hey guys!

So...I went for my cousin's wedding last night and of course I wouldn't go with naked nails!

Matching my dress which was red with black lace around the waist, I went for a nice simple design using Bundle Monster stamping plates.

(Photo at the bottom of the post)

I used Faceshop's black polish to stamp on a rose design onto OPI Big Apple Red.

My bf decided to call this mani Roselle. 😂

I still had to 'paint-by-numbers' cause the black polish doesn't come out opaque after being stamped. All in all still pretty!

Hope you like it!
Cheers!

Monday, September 29, 2014

Fashion Inspired Dots

Hello!

There are a lot of nail artist out there that use fashion as an inspiration for nail art designs. One of my favorite  nail artists is Taryn from Miss LadyFinger. Go check her and her beautiful nail designs out.

For this post, I chose my new Fossil zip clutch which I adore! It's a really cute wallet in shade of coral with black polkadots on it. (Photos can be found at the bottom of the post)

I used Essie's Tart Deco for the base which has become one of my favorite coral polishes and my (cannot love without) black polish from The Faceshop for the dots.

This is also my first time using a lightbox. I read one of articles of NailIt mag and they had instructions on how to DIY your own lightbox. Don't get me wrong...I haven't built it yet. Just so happened that my bf had one and I was in the mood. 😛

It was pretty fun playing around with it. Hopefully I get to making one soon. Anyways...enjoy and see you next time.

Cheers!

Sunday, September 28, 2014

Laval meets Nail Vinyls

Hi all!

I just downloaded the Blogger app on my phone is hopes that I blog more often. Especially since all the photoa are on my phone.

Today's post is a swatch of a UK brand - Laval. My parents recently returned from holiday and got me a few souvenirs! Among the colours, I found this shade really pretty! (Using the blogger app, all photos will be at the bottom of the post, sorry for the inconvenience)

Laval's Blue Lightning is a really sheer blue shimmer polish and when I say sheer I mean really sheer. Even with 3 - 4 coats, I could still see the base of my nails. Never the less, a beautiful colour it is.

After realising it's name, I took it upon myself to have a little fun with some of Teismom's nail vinyls.

Using the lightning vinyl and topping it off with a coat of Faceshop's black polish...blue lightning it became!

Oh the pun...ba dum tsst (do ignore my lame ness)

That's it for this post! Hopefully I get used to this app so I can blog better.

Cheers!

Friday, May 23, 2014

Mr Men & Little Miss

Hello Everyone! 
How are you all today? 
Today's story begins with another story. 


photo credits to silhouetteonlinestore.com 

I love Mr Men and Little Miss stories! Don't you?? Of course you do! =D
I've been trying to find the whole collection but of course when I finally find one it's super duper extremely over my budget. =( 
I WILL OWN YOU ONE DAY! 


So here's today's mani featuring Little Miss Bad, Little Miss Sunshine, Mr Bump & Mr Happy! 

Seriously want a thinner brush...I'm too scared to trim it myself >< Been trying to source nice detailing brushes. Do let me know if you guys know anywhere with good ones. =)

That's it for this post! 
Cheers! ^^ 

Wednesday, May 21, 2014

Stamping Fever!

Elo Elo!
I've been super into konad recently and my current fav is Bundle Monster's 'Create Your Own' Collection 2013 (CYO 2013).

photo credit to www.bundlemonster.com

Yeah! So those are the plates included in the collection. Who says that freestyle is the only way to go!
I used to be so against using konad since the first time I used it and it turned out to fugly! >< 

But after getting slightly better I wanna find more ways to create manis with them! 

Here are some of the mani I did with the CYO 2013. 


Really like the binary code mani! I really want proper konad polishes now tho. The normal nail polish doesn't stick as much and sometimes ends up super light.

Definitely going to try out more designs and never forgetting to do some freestyle! Venturing out into another style of nail art soon!

That's it for now!
Cheers! ^^

Tuesday, May 20, 2014

The Lazy Blogger

Hey guys!
I seriously have nothing to say anymore...
I have been away from blogging for nearly half a year now...
I can't really say I was busy since I did have my bored moments here and then where I was able to blog...

ANYWAY! ENOUGH WITH THE SAD! 

HERE'S AN UPDATE ON ME!

If you guys follow me on instagram @chronosz (do note that this is my personal account and is not nails only), then you'll know that I have finally graduated with a Bachelor in Media from RMIT University! ^^


Whoopie! It was a bit hectic near the end of 2013. Went on a graduation trip to Tasmania, went back to Malaysia for my birthday, flew back to Melbourne for a roadtrip from Sydney to Melbourne with my parents and boyfriend, GRADUATED! and flew back the next day for good!

Yup! That was such a rush and I came back to a reunion dinner at that! So here I am 5 months into 2014 working a desk job! >< 

I've finally gotten used to work I know it took damn long and blogging again. Well not blogging doesn't mean I haven't been painting my nails! ^^

Here's my first mani back! Painted this for my grandfather's 82nd Birthday Party last Saturday.


Polishes are OPI Bubble Bath and NDLacquers Lovers in Lourve. 
Isn't the glitter oh so pretty! 

Natali from NDLacquers mixes such pretty colours! Her newest collection is glowy blacklight polishes! So awesome!!! 

Check them out on her website http://www.ndlacquers.com/

That's it for the memory lane post! See you guys! 

Cheers!